
|
PLEASE PATRONIZE OUR SPONSORS!


|
#1
 02-20-2012, 03:23 PM
|
||||
|
||||
|
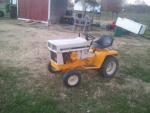
I received the power steering valve by mail and would like to clean it out. Does anyone know what to use and how best to do it? When I turn the shaft it gurgles and spits but I'm not sure what to do next. Also, below is a diagram of the PS system and I would like for any of you who know which is the pressure side and the suction side of the system to help me be sure I have it right. I have #9 as the pressure and # 6/8/12 as the return. Is that the way you see it? It's hard to see it on the picture but #9 goes into the valve at the "In" port and #8 goes to the "Out" port and #7 goes from the "Aux" port up to the lift valve. The other issue I will have is that I have the other style lift valve and will need to convert the ends of 1862 lines to the old style fittings. Any experienced person want to chime in on this? The ram lines and ports are marked clearly and should be no problem. The picture sorta makes the lines look real long but in real life the bottom of the valve to the bottom of the lift valve is only about 10 inches.
That makes #7about 10 or 11 inches long. #6 will be about the same but will go to the "T" fitting.
__________________
1811 Hydro "Failing to prepare is preparing to fail". 

|
|
#2
02-20-2012, 06:29 PM
|
||||
|
||||
|
Rudy, there is a detailed section in the 72-82 series service manual. I have not done one yet but I will soon. I hear that JD is cheaper on the parts. Make sure and take some pictures for us...you know how we are.

__________________
This ain't no hobby....it's an addiction
|
|
#3
02-20-2012, 08:40 PM
|
||||
|
||||
|
Yeah, I was surprised that the JD stuff was so much cheaper but when you go on their web site you see 350 viewing at the time you are on it. Our's is about 50 or less most of the time. I missed out on steering valve at $126 but got the next one for $125. The CC models are going for the high $100's to low to mid $200's. Just be sure and get the 5 port model. Evidently they made a four port model that won't work on our CC's. It looks like a straight bolt on except for fabricating the lines/hoses to fit the new configuration. Once I bought the JD GX335 which had PS I could not go back. To be able to turn the wheels in either direction while stopped was amazing. I did not want to keep the JD but wanted to keep and use my CC 1811 that I have come to know and love. We are both old and need work to keep us going! As soon as I get some parts I will break out the camera. I know what picture freaks we all are too. I'm still waiting for some help on the hydro fittings for the new lines.
__________________
1811 Hydro "Failing to prepare is preparing to fail".
|
|
#4
03-01-2012, 10:49 PM
|
||||
|
||||
|
I got the ram and a whole box of hard lines today from Rich at Patton's and started my testing assembly of all of the parts. The ram went on just like the book shows however when I turn the wheel to the left it hits the ram before it runs out of turning room. I did not have the drag link on so maybe that will help. The ram lines hooked up without any issues but that's where the fun ended. Rich sent me a long line that will fit from the tranny output port (pressure) to the #9 input port on the steering valve but the original 90 degree turn from the tranny is too far out on the new line and hits the drive shaft flex joint. Is there a way to cut the line and re-flare it with the end fitting still on the line? I can slide it down to where the line bends but I don't think there will be enough line to get the flare tool on. The line from the valve aux port to the hyd raise/lower valve is pretty simple and should not be a problem. The mother of all line problems is going to be the return lines that all come together and then back to the tranny. Chip, who sold me the front 1862 axle said that he used brake lines and flared them himself. I haven't been able to find anyone in my area that sells the end fittings. Do any of you know a source for the 3/8 fittings? In the pictures below you can see the line with the 90 degree bend next to the OEM line and where I have straightened the new one some. If I did get the new line cut and flared how would I put the 90 degree bend back in the line so close to the fitting?The next pic is the ram hitting the left front wheel. Then the box of lines that Rich sent to help me out and finally the steering column that I had to add about 10 inches to.
__________________
1811 Hydro "Failing to prepare is preparing to fail".
|
|
#5
03-02-2012, 12:00 AM
|
||||
|
||||
|
I got my 3/8 fittings at Napa
__________________
Jed Proud to be a FFA member Westmoreland,TN Chapter 1978 Cub cadet 1450 IH Hubcaps 1975 1650SGT Work In Progress 1974 cub cadet 129 with sleeve hitch/spring assist 1974 108 (Mint) #510358 brinly 12 in plow,disc,8 in plow ,2 42, 2 44A ,50A DECKS #40 boxblade,can`t keep up with the rest lol    
|
|
#6
03-02-2012, 12:10 AM
|
||||
|
||||
|
That's the first place I tried but they said they don't carry that stuff any longer. Even their brake line selection was one little rack and they were all pre-made.
__________________
1811 Hydro "Failing to prepare is preparing to fail".
|
|
#7
03-02-2012, 07:52 AM
|
||||
|
||||
|
I ran into the same thing on the ram hitting the wheel on the my 782 P.S. converson, using a deere ram
I just extended the axle stubs on the front spindles. It seems like 2-1/2"--- works great and makes the front end feel more stable on turns. Those fittings are Jic Hyd fittings, "parker" is one name brand, I think Granger has them. I see them on evilpay very often.
|
|
#8
03-02-2012, 11:04 AM
|
||||
|
||||
|
Rudy, I got my fittings at a tractor repair shop that makes up hydraulic lines. They had all sorts of fittings. Any of them should have them.
I don't understand why the ram would be hitting the tire though. That is a power steering axle. Do you have a picture of the whole steering ram from its mount to the spindle? I'll get some pictures of what I used to bend a flare my lines. Just cheapo tools.
__________________
Chip T. Drexel NC
|
|
#9
03-02-2012, 11:21 AM
|
||||
|
||||
|
I bought this Gates flaring tool on ebay for around $25. I just looked and couldn't find one like it but there are several on there. This one will do 45 and 37 degree flares. I think I got the bender at harbor freight on the cheap.
__________________
Chip T. Drexel NC
|
|
#10
03-02-2012, 12:13 PM
|
||||
|
||||
|
I see that there is always a way to do anything just from your responses. Chip, how do you make a 90 degree bend like the ones on top of the tranny with the fitting already on the line? Or did you do the bend first and then put the fitting on the line and then flared it? I was looking at the PS kit for the 82 series that was offered by IH as a DIY conversion kit. They used a combination of unions, 90 D elbows and hoses to do most of the conversion. I was thinking of keeping the two main lines from the tranny and using unions and short hoses for the final connection. Any comments on this method? In the conversion kit they used 90 d elbows on the PS valve and then hoses or short lines with another 90 d on the end. I found a place near me that makes hoses and they have all of the needed fittings for hoses but none for lines. Chip, did you use 3/8 brake line to make your lines? Is there any special way to bend or re-form the OEM lines? They seem so damn hard that I was afraid I would break them. Would heat help? I'm on a search and decide mission today to see if I can find some local answers. Once again thank you for your ideas. BTW, George, how did you extend the fron axles?
__________________
1811 Hydro "Failing to prepare is preparing to fail".
|
 |
|
|
Cub Cadet is a premium line of outdoor power equipment, established in 1961 as part of International Harvester. During the 1960s, IH initiated an entirely new line of lawn and garden equipment aimed at the owners rural homes with large yards and private gardens. There were a wide variety of Cub Cadet branded and after-market attachments available; including mowers, blades, snow blowers, front loaders, plows, carts, etc. Cub Cadet advertising at that time harped on their thorough testing by "boys - acknowledged by many as the world's worst destructive force!". Cub Cadets became known for their dependability and rugged construction.
MTD Products, Inc. of Cleveland, Ohio purchased the Cub Cadet brand from International Harvester in 1981. Cub Cadet was held as a wholly owned subsidiary for many years following this acquisition, which allowed them to operate independently. Recently, MTD has taken a more aggressive role and integrated Cub Cadet into its other lines of power equipment.
This website and forum are not affiliated with or sponsored by MTD Products Inc, which owns the CUB CADET trademarks. It is not an official MTD Products Inc, website, and MTD Products Inc, is not responsible for any of its content. The official MTD Products Inc, website can be found at: http://www.mtdproducts.com. The information and opinions expressed on this website are the responsibility of the website's owner and/or it's members, and do not represent the opinions of MTD Products Inc. IH, INTERNATIONAL HARVESTER are registered trademark of CNH America LLC
All material, images, and graphics from this site are the property of www.onlycubcadets.net. Any unauthorized use, reproductions, or duplications are prohibited unless solely expressed in writing.
Cub Cadet, Cub, Cadet, IH, MTD, Parts, Tractors, Tractor, International Harvester, Lawn, Garden, Lawn Mower, Kohler, garden tractor equipment, lawn garden tractors, antique garden tractors, garden tractor, PTO, parts, online, Original, 70, 71, 72, 73, 76, SO76, 80, 81, 86, 100, 102, 104, 105, 106, 107, 108,109, 122, 123, 124, 125, 126, 127, 128, 129, 147, 149, 169, 182, 282, 382, 482, 580, 582, 582 Special, 680, 682, 782, 782D, 784, 800, 805, 882, 982, 984, 986, 1000, 1015, 1100, 1105, 1110, 1200, 1250, 1282, 1450, 1512, 1604, 1605, 1606, 1610, 1615, 1620, 1650, 1710, 1711, 1712, 1806, 1810, 1811, 1812, 1912, 1914.


 Linear Mode

