
|
PLEASE PATRONIZE OUR SPONSORS!


|
|||||||
 |
|
|
Thread Tools | Display Modes |
|
#1
 08-10-2009, 07:24 PM
|
|||
|
|||
|
I found the breaker points with out an issue for a K241 motor, I looked on the flywheel for the S or SP mark and could not find a mark. Now I am looking for the bearing plate or blower housing where is this located? because I cannot find it. I know it's in front of me and on the engine but for the life of me I have no idea where it is.
Help a brother out and point me in the general direction so I can change the points and condenser and get it running better again. 
|
|
#2
08-10-2009, 07:40 PM
|
||||
|
||||
|
If you want to try it without a light and be done with it... here's how.
Remove the points cover. Loosen the screw holding the adjustment. With your left hand turn the engine by turning the starter pulley. Notice when the points start to open and where the engine pulley is. Keep turning until they almost close. Note where the pulley is. Now turn the engine back halfway from where they started to open and almost closed. This is your gap point. Set the points to 0.18 and tighten. Recheck your setting after you tighten the adjusting screw. Sometimes they move. Usually to the closed side. If you make this setting perfect your tractor will start on the first or second revolution. 
|
|
#3
08-10-2009, 09:42 PM
|
||||
|
||||
|
FYI...gapping the points will almost never make the timing be in the right place. I have had tractors that would barely run with the points at the manual specification of .020". I've had smooth running occur at gaps like .011" or .028" or so.
The bearing plate is the aluminum plate that is bolted to the block under the flywheel. The blower housing is the piece of sheetmetal that surrounds the flywheel. There's a roughly 3/4" hole in the blower housing on the right side of the tractor. Shine a bright light through the hole as you rotate the flywheel. The marks are usually hard to see. When you find them, wipe some paint or white-out in them so you can see them. Then you can use your timing light, or my preference, an ohmmeter, to set the timing.
|
|
#4
08-10-2009, 09:44 PM
|
||||
|
||||
|
Hey angry,hers a couple pics!!
Here is the plug in the bearing plate,difficult position to get to,the Starter generator is kinda in the way!!The bearing plate is silver in the picture the plug looks orange in this picture.  In this picture the plug is behind the starter generator bracket bolt farthest away or to the left in the picture.Kinda hidden behind the bolt in the picture. 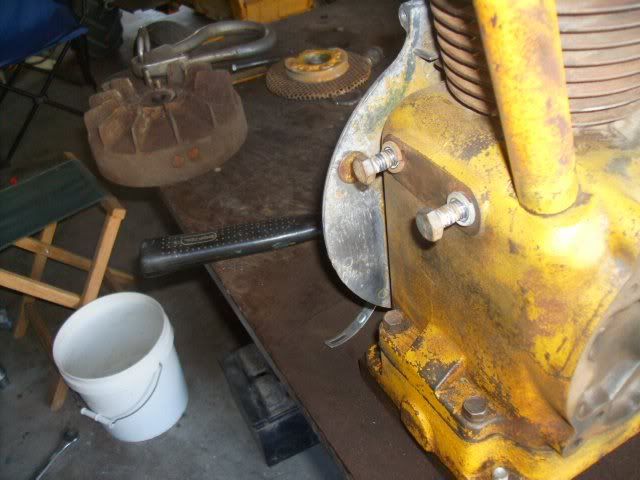 this is the timing marks on a 7 horse,I DO NOT Know how different they are on the 10 and 12 ect.In my book it also says s or sp but there is a t inprinted???? 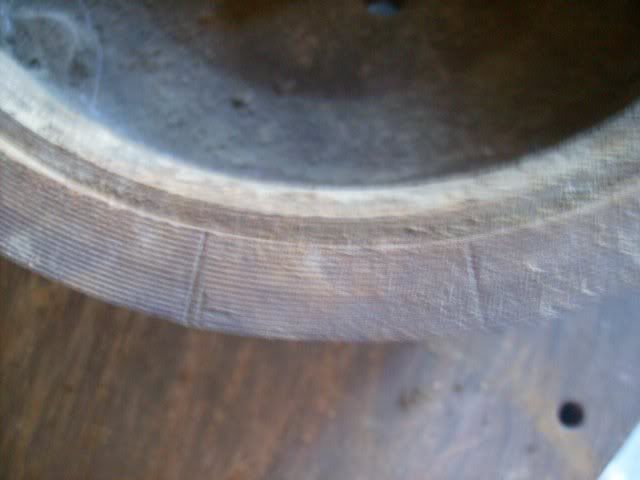 Here is a picture of the bearing plate with the flywheel removed and fly wheel cover removed,this is the drive shaft side of the engine. 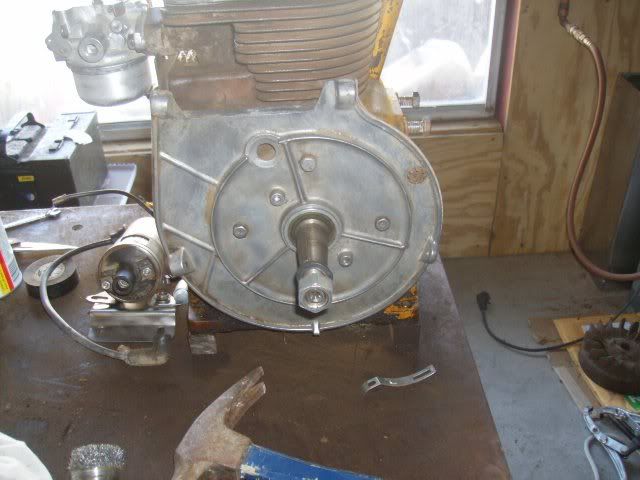 Here is a picture of flywheel cover,flywheel and bearing plate!!All loose on this particular Engine. 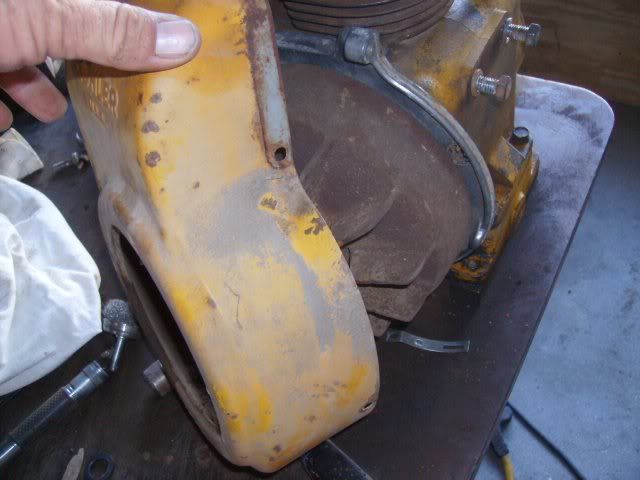 I cant see how to use a timing gun without removing the starter generator although Ive never set the timing that way!!Maybe someone can give you tips on that!! Good luck Jason
__________________
Jason Davis :biggrin2.gif: Just one more !! 
|
|
#5
08-10-2009, 09:49 PM
|
||||
|
||||
|
Im sorry I dont have the ability to put arrows on the pictures!!
Matt, Please explain the ohm meter timing setting,seems like possily it would be easier than getting a timing light in there!!! Jason
__________________
Jason Davis :biggrin2.gif: Just one more !!
|
|
#6
08-10-2009, 09:51 PM
|
||||
|
||||
|
Angry,
Are you sure its the timing??Or Are you just doing a maintenance on it and want to replace these parts and Re-Time it?? Just wondering. Jason
__________________
Jason Davis :biggrin2.gif: Just one more !!
|
|
#8
08-10-2009, 10:41 PM
|
||||
|
||||
|
Quote:
|
|
#9
08-11-2009, 02:31 AM
|
|||
|
|||
|
Thanks for all the help....... now I know where to look and get the job done I figured as long as I am replacing the points I might as well check the timing. Thanks for all the pictures that helped out as well, as how others have done it.
Thanks once again!!
|
|
#10
08-12-2009, 04:28 PM
|
|||
|
|||
|
To use a ohm meter, you connect the ohm meter to the points. There should be no reading. You then turn the engine in the direction that it turns normally. You then need to look inside the timing hole and set your points so that you just start to get some resistance when the timing mark is at "S" or "SP". I think the "T" marks Top Dead Center. This makes sure that your spark is firing at 20 degrees before TDC. The push rods that open the points wear over time and the .020" isn't always correct. You use a ohm meter because without one, you can't see the actual point where the points begin to open.
AJ
__________________
1980 [COLOR="Red"][/COLOR]482- Stock 1981 [COLOR="Red"][/COLOR]582- Mag18, Sleeve Hitch, Spring assist 1979 [COLOR="Red"][/COLOR]682- Mag18, Sleeve Hitch, Spring Assist, #1 Tiller 1980 [COLOR="Red"][/COLOR]782- Mag18, Sleeve Hitch 1983 [COLOR="Red"][/COLOR]982- Stock, Fully Optioned
|
|
|
|
Cub Cadet is a premium line of outdoor power equipment, established in 1961 as part of International Harvester. During the 1960s, IH initiated an entirely new line of lawn and garden equipment aimed at the owners rural homes with large yards and private gardens. There were a wide variety of Cub Cadet branded and after-market attachments available; including mowers, blades, snow blowers, front loaders, plows, carts, etc. Cub Cadet advertising at that time harped on their thorough testing by "boys - acknowledged by many as the world's worst destructive force!". Cub Cadets became known for their dependability and rugged construction.
MTD Products, Inc. of Cleveland, Ohio purchased the Cub Cadet brand from International Harvester in 1981. Cub Cadet was held as a wholly owned subsidiary for many years following this acquisition, which allowed them to operate independently. Recently, MTD has taken a more aggressive role and integrated Cub Cadet into its other lines of power equipment.
This website and forum are not affiliated with or sponsored by MTD Products Inc, which owns the CUB CADET trademarks. It is not an official MTD Products Inc, website, and MTD Products Inc, is not responsible for any of its content. The official MTD Products Inc, website can be found at: http://www.mtdproducts.com. The information and opinions expressed on this website are the responsibility of the website's owner and/or it's members, and do not represent the opinions of MTD Products Inc. IH, INTERNATIONAL HARVESTER are registered trademark of CNH America LLC
All material, images, and graphics from this site are the property of www.onlycubcadets.net. Any unauthorized use, reproductions, or duplications are prohibited unless solely expressed in writing.
Cub Cadet, Cub, Cadet, IH, MTD, Parts, Tractors, Tractor, International Harvester, Lawn, Garden, Lawn Mower, Kohler, garden tractor equipment, lawn garden tractors, antique garden tractors, garden tractor, PTO, parts, online, Original, 70, 71, 72, 73, 76, SO76, 80, 81, 86, 100, 102, 104, 105, 106, 107, 108,109, 122, 123, 124, 125, 126, 127, 128, 129, 147, 149, 169, 182, 282, 382, 482, 580, 582, 582 Special, 680, 682, 782, 782D, 784, 800, 805, 882, 982, 984, 986, 1000, 1015, 1100, 1105, 1110, 1200, 1250, 1282, 1450, 1512, 1604, 1605, 1606, 1610, 1615, 1620, 1650, 1710, 1711, 1712, 1806, 1810, 1811, 1812, 1912, 1914.


 Linear Mode

