
|
PLEASE PATRONIZE OUR SPONSORS!


|
|||||||
 |
|
|
Thread Tools | Display Modes |
|
#11
 08-29-2012, 06:31 PM
|
||||
|
||||
|
Quote:

|
|
#12
08-29-2012, 09:11 PM
|
|||
|
|||
|
Matt,
Why, then, do I experience more vibration with the mounts loose in their mountings, such as with the nuts at two threads showing? I experience a little bit less vibration with the mounts tightened down. Why is it, when I contacted MTD, the parts supplier, that they continued to recommend the 100 inch-pound torque after I explained my problem to them? I asked them about ruining the mounts due to overtightening and they told me that was nonsense. Brian Wittman
|
|
#13
08-29-2012, 10:53 PM
|
|||
|
|||
|
Thanks for the warm welcome as well as the knowledge fellas. As the photo below shows, I was able to get the engine out after about 30 mins work tonight. It was a combination of exciting and somewhat depressing as almost all of the fasteners had their original paint still perfect on them. I must also give IHC credit, previous experience with fasteners on other colored larger iron has been that everything is TIGHT. On this tractor, everything was barely snug, yet no hardware was missing that I can find, and after 35 years I was still able to crack bolts/nuts loose with 1/4 wrench turn then unscrew by hand. Hopefully to contribute an idea for others - I dont have an available hoist as I havent moved most of my tools to the new/old house yet, and rather than grunt it due to the awkwardness of handling, I ran a strap around a long 4x4 to make a "handle" that myself and her could get on each end of. We lifted, and I then fed her the excess length from my side in order to place the engine alongside the tractor without either of us taking a single step.
Found another item to buy - a driveshaft fan. The currently installed one is painted yellow and has no more than 1/2" of any blade left on the hub. Unfortunately I had a rather busy day today, and have to be up in another 7 hours for another 10 of work, so I did not pull the old pan tonight. I will take a pic or two when I do and we can check to make sure IHC installed balance gears along with any other requests. 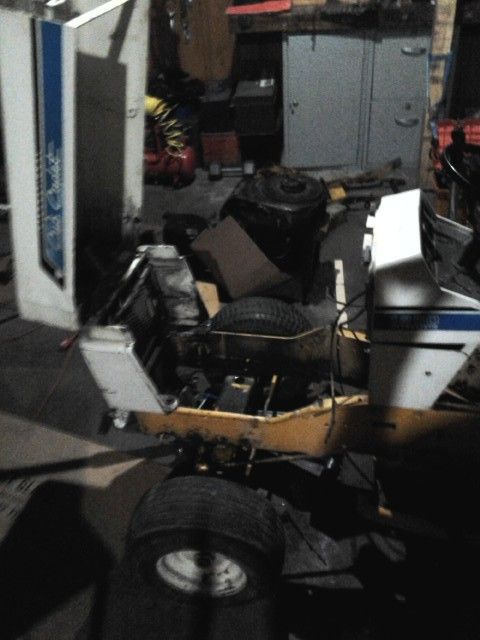
|
|
#14
08-29-2012, 11:54 PM
|
||||
|
||||
|
Quote:
Quote:
You can continue to accept MTD's 'advice' as gospel, but there is a lot of cumulative experience with the installation method that's been provided on this forum and others that proves the instructions don't work.
|
|
#15
08-30-2012, 07:26 AM
|
|||
|
|||
|
Being in the HVAC/R trade, there is one thing I have learned a long time ago. A parts guy is NOT a service tech and vice versa. It is fruitless to ask a Parts Man a technical question. They may know how to look parts real good, get the parts you need...... BUT may have never turned a wrench, let alone read or look into a service manual.
__________________
[B]Roland Bedell[/B] CC Models: 100, 105, 1450, 782, (2) 784, & 2072 [SIZE="4"][B][COLOR="Red"]Buy:[/COLOR][COLOR="Blue"] Made in the USA[/COLOR][/B] [/SIZE]:American Flag 1:
|
|
#16
08-30-2012, 05:56 PM
|
|||
|
|||
|
Quote:
I also got a quote on new ISO mounts from the same dealer today and experienced a bit of sticker shock, but thought I should inquire herein about the price. The quote was for $100 for 4 mounts and 2 front rubber bumpers, complete with all of the necessary hardware, which I think is rather exorbitant, but list is supposedly $120+. I see several other aftermarket sources via ebay and others for ~$30, and am curious if anybody has any recommendations or advice?
|
|
#17
08-30-2012, 10:41 PM
|
|||
|
|||
|
Quote:
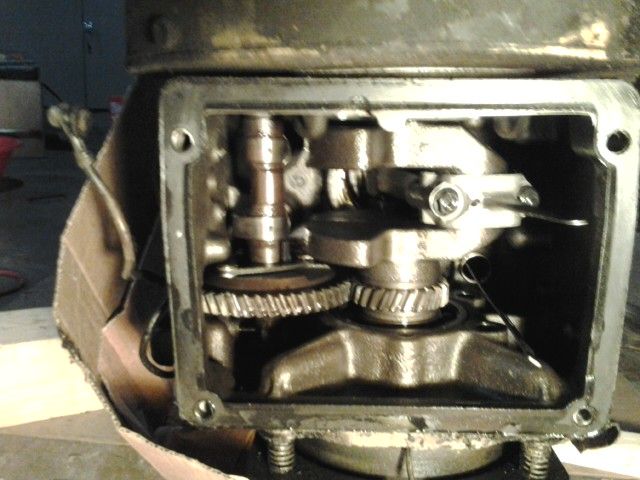 I read/heard somewhere that none of the QuietLines had balance gears, and it is definitely true in my case. The only gears in the crankcase are the cam timing pair. Didnt get much done tonight, but I did pull the pan off, and everything looked spotless inside. I still need to scrape the old gasket and clean up the new/old pan (gasket remnants) prior to install. Sorry if I am working on this rather slowly for some, but life has been rather busy lately and shop time has been scarce. I am determined however to do something on it every night until its done or Im out of parts however, even if its only 5 minutes and 4 bolts worth.
|
|
#18
08-30-2012, 10:45 PM
|
||||
|
||||
|
Quote:
|
|
#19
08-31-2012, 10:52 PM
|
|||
|
|||
|
Thanks for the continued support Matt.
I left work a bit early today to pony up at two different local dealers (nobody had 4 mount kits), and for just over $100 came away with four mount kits, two bumpers, and a new driveshaft fan. Tonight I also managed to get a small bit of work done on the engine and tractor. I cleaned up the new/old oil pan and block gasket surfaces, installed and torqued the pan down to 35 ft-lbs per the manual. In the process, I had the thought that patience now may save me time later - I decided to put a quart of oil in the engine with it outside of the tractor and let the engine sit overnight to guarantee no leaks when I reinstall it tomorrow. I then spent an hour or so degreasing the engine bay and underneath the tractor. I also discovered a bit of damage. When I pulled the engine, the front mounts were standing tall and strong, but the rears were squashed down to ~1/8" and not doing much. 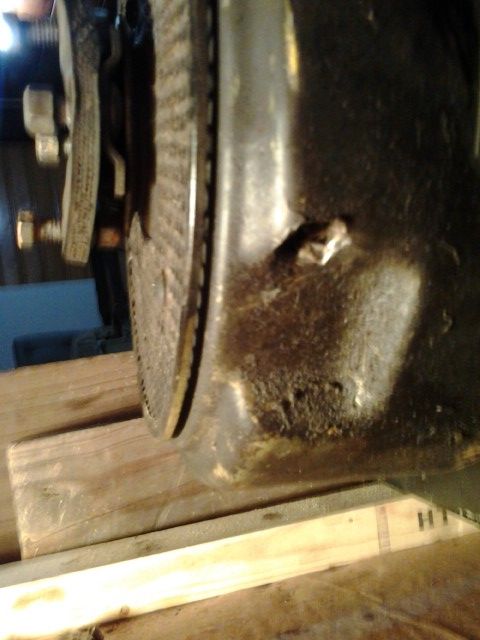 Right rear engine mount bolt/nut poked this hole in the flywheel cover. 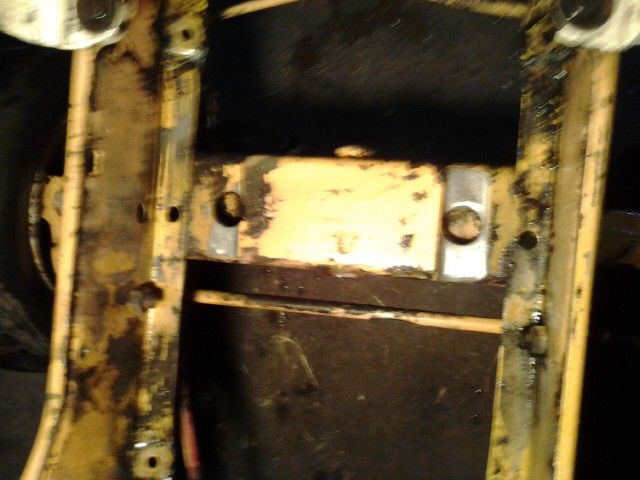 Engine cradle appears to have rubbed grooves in the front crossmember. The front of the left groove is untouched and still painted, while the rear of the right groove is worn .150 according to a dial caliper. Tomorrow Im hopeful to get this tractor completely reassembled within an hour or two after our weekly trip to the farmer's market in the am, do a bit of engine tuning, and maybe even a bit of mowing/testing. Once its running strong and steady, and a bit of mowing has been done, I will look into opening up the rearend to clean out any potential sludge buildup and start on the million other lil tasks to make this tractor perfect again.
|
|
#20
08-31-2012, 11:01 PM
|
|||
|
|||
|
Hi justanengineer,
From my experience, a hundred bucks is what will have to be spent on new Cub Cadet ISO mounts and snubbers. I think my ISO's were about $19.20 for each set and one needs four sets. I am really interested in your experience with these mounts. Next year, I am going to replace mine once again with identical mounts to see if Matt is correct. I don't think the mounts were deformed by tightening to recommended specification. When I loosened them from my original install, they relaxed well and yet, still had vibration. After re-tightening them, the vibration is somewhat less, although it still vibrates more than I think it should. I continue to be amazed at the diverse opinion on this subject. From what has been discussed previously, there seems to me no correct or incorrect answer; but rather, many different experiences. Please keep me posted on our progress. The only things that should be green and yellow are the NDSU Bison. GO Bison!
|
|
|
|
Cub Cadet is a premium line of outdoor power equipment, established in 1961 as part of International Harvester. During the 1960s, IH initiated an entirely new line of lawn and garden equipment aimed at the owners rural homes with large yards and private gardens. There were a wide variety of Cub Cadet branded and after-market attachments available; including mowers, blades, snow blowers, front loaders, plows, carts, etc. Cub Cadet advertising at that time harped on their thorough testing by "boys - acknowledged by many as the world's worst destructive force!". Cub Cadets became known for their dependability and rugged construction.
MTD Products, Inc. of Cleveland, Ohio purchased the Cub Cadet brand from International Harvester in 1981. Cub Cadet was held as a wholly owned subsidiary for many years following this acquisition, which allowed them to operate independently. Recently, MTD has taken a more aggressive role and integrated Cub Cadet into its other lines of power equipment.
This website and forum are not affiliated with or sponsored by MTD Products Inc, which owns the CUB CADET trademarks. It is not an official MTD Products Inc, website, and MTD Products Inc, is not responsible for any of its content. The official MTD Products Inc, website can be found at: http://www.mtdproducts.com. The information and opinions expressed on this website are the responsibility of the website's owner and/or it's members, and do not represent the opinions of MTD Products Inc. IH, INTERNATIONAL HARVESTER are registered trademark of CNH America LLC
All material, images, and graphics from this site are the property of www.onlycubcadets.net. Any unauthorized use, reproductions, or duplications are prohibited unless solely expressed in writing.
Cub Cadet, Cub, Cadet, IH, MTD, Parts, Tractors, Tractor, International Harvester, Lawn, Garden, Lawn Mower, Kohler, garden tractor equipment, lawn garden tractors, antique garden tractors, garden tractor, PTO, parts, online, Original, 70, 71, 72, 73, 76, SO76, 80, 81, 86, 100, 102, 104, 105, 106, 107, 108,109, 122, 123, 124, 125, 126, 127, 128, 129, 147, 149, 169, 182, 282, 382, 482, 580, 582, 582 Special, 680, 682, 782, 782D, 784, 800, 805, 882, 982, 984, 986, 1000, 1015, 1100, 1105, 1110, 1200, 1250, 1282, 1450, 1512, 1604, 1605, 1606, 1610, 1615, 1620, 1650, 1710, 1711, 1712, 1806, 1810, 1811, 1812, 1912, 1914.


 Linear Mode

